


Sandra owns a small laboratory equipment shop in Denver. Her suppliers have levied a 2% additional tax on the transportation cost which varies based on the distance of delivery. (gas is expensive and nothing is free). Sandra is looking out to optimize her profit margins by sourcing more from near by dealers. She needs a service that gives her distance of delivery of her suppliers. She has her supplier data on a spread sheet and she is able to Google out delivery point address of all lab equipment vendors in the US from Internet (each with unique state allotted vendor ids). Lets see how data mashup can help her with the cost cutting mission.
Prerequisites
1. NetBeans IDE
Step 1: Identify your data sources
There are two data sources involved here.
- Spreadsheet (Data format available with Sandra)

- A text file with csv data (Data from Internet)

Step 2: Create Mashup Database
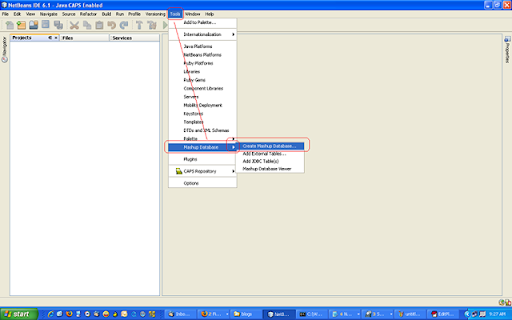
- Launch your NetBeans IDE
- Go to Tools --> Mashup Database --> Create Mashup Database.
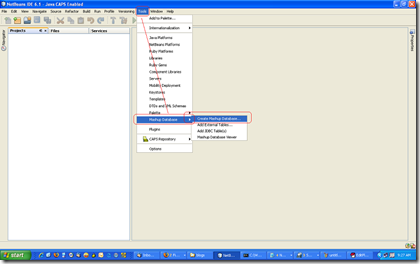
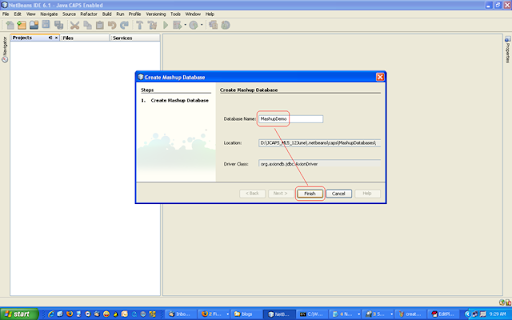
- Name the database appropriately for the project/service it serves. Say Finish. A success message confirms that the database was created successfully.

Step 3: Add External table (Spread Sheet) to the created mashup database
As the database involved here is non-relational, data needs to be staged into a relational database so as to use it into a federated data pool.
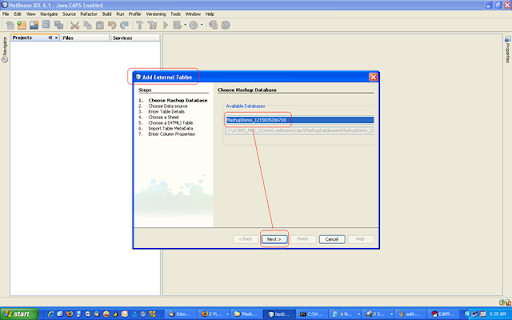
- Go to Tools --> Mashup Database --> Add External Tables ...
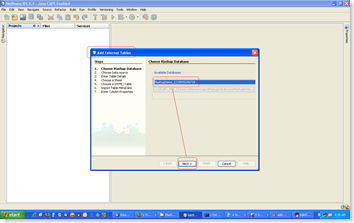
- Add the spread sheet data into the mashup database
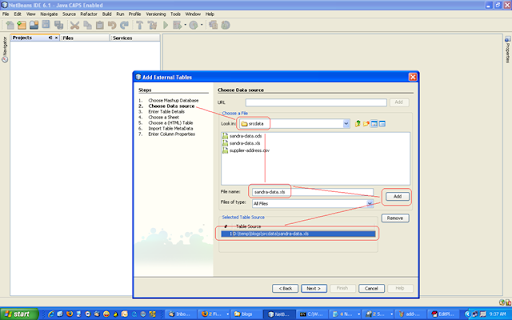
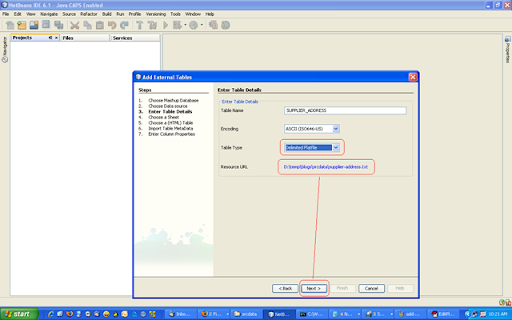
- Browse to the xls folder and select the file. Add it into Selected table list.
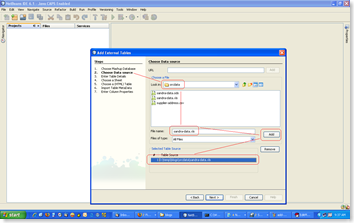
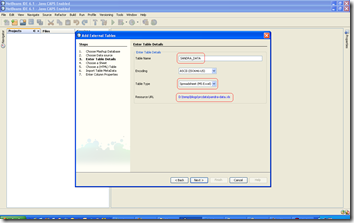
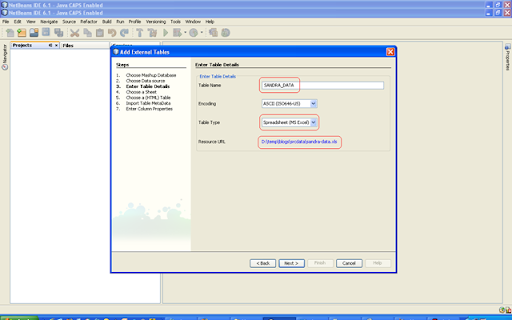
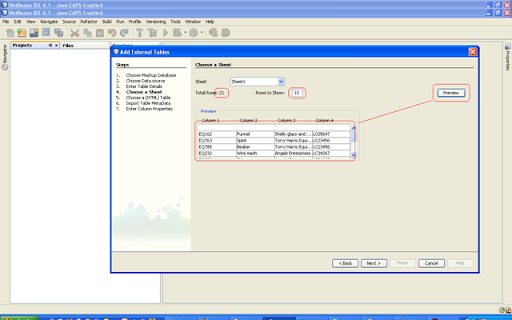
- Ensure that correct table type is listed by verifying the highlighted blocks.
- Preview the data and say next.
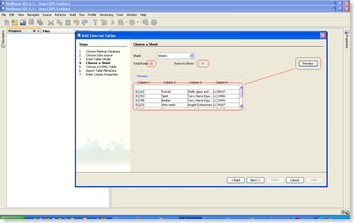
- Edit the column properties by double clicking on the column fields in the table. Press enter when done. The changes get reflected in preview table window.
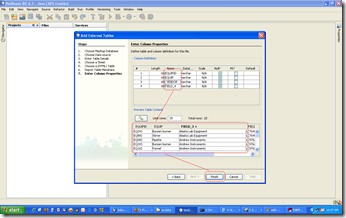
- Press Finish and look out for success message to confirm that the table was added.

Step 4: Add External table (Text File) to the created mashup database
As the database involved here is non-relational, data needs to be staged into a relational database so as to use it into a federated data pool.
- Go to Tools --> Mashup Database --> Add External Tables ...
- Add Text file (delimited) data into the mashup database
- Browse to the folder with text file. Select and add it into table list. Go to Next.
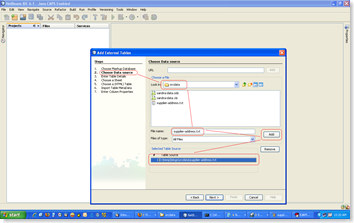
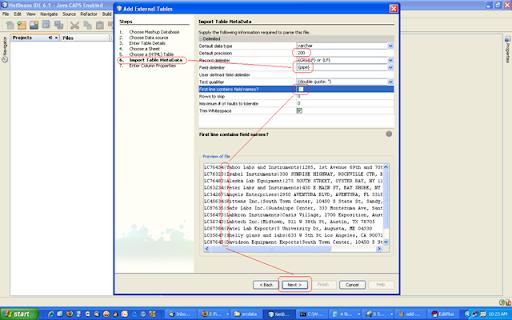
- Ensure that correct table type is listed by verifying the highlighted blocks.

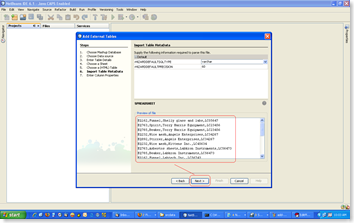
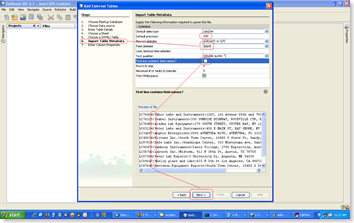
- Change the table Metadata properties like default precision, delimiter etc suitable for file setting. Preview if the data in the text file is parsed properly and say 'Next'.
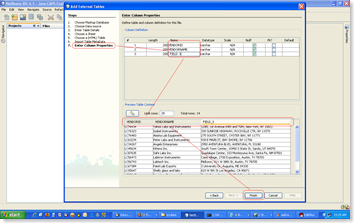
- Change the default column names to some appropriate names. Say Finish.
- Look out for success message to confirm that the table was added.


Step Verification
- Verify that the database was created in the NetBeans Services Tab with tables and columns.
- Right click on the table and 'View Data' to see if the data from spread sheet and CSV file in available in the database.

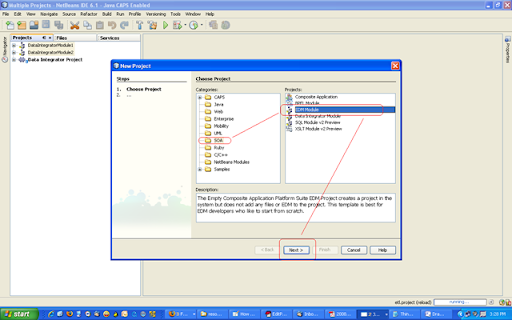
Step 5: Creating Mashup Project using NetBeans
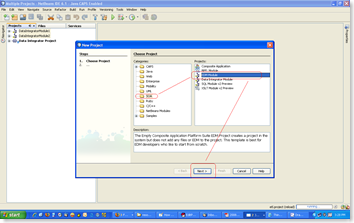
- On the NetBeans menu, go to File --> New Project --> SOA --> EDM Module --> Next
- Name your mashup project and select the location where you want the project to be created. Finish the wizard.
- Observer the Mashup project being created at the specified location. Project also shows up as active project on the NetBeans projects tab
- On the NetBeans Project tab, browse to the Mashup Project (SandraEDMApp for this demo). Right click on the 'defaultpackage' node and select New --> Others --> SOA --> EDM --> Next on the pop-up.
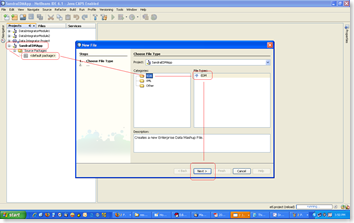
- Name the EDM file (SandraEDM for this project ) and Finish the wizard. A blank canvas is created on the active NetBeans window. Also, observe that SandraEDM.edm is created under default package of your SandraEDMApp project.


Step 6: Creating Data Join
Till the previous step, we have achieved bringing the diverse data into a common staging area. In order to create federated view, data in the staging tables need to be federated. Here is how it can be done by creating data joins.
- From the NetBeans palette, drag-and-drop the join operator on the mashup canvas.
- Create New Join View editor comes up on this action.
- Press "All" button on the editor to join all the tables.
Note that join preview gives an option of editing join types i.e. inner, outer etc.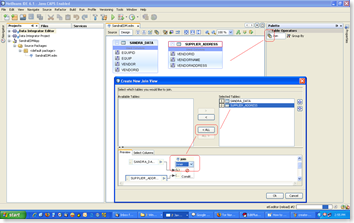
- Select OK to finish the wizard. Canvas will be added with additional root join widget.
- Open Properties panel on NetBeans and select Root Join Widget by clicking over it.
- Edit the join condition by edit button on Join condition property.
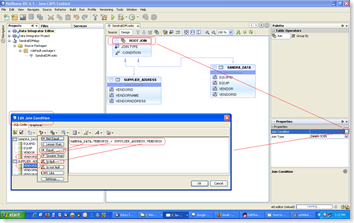
- For this case join condition is (SANDRA_DATA.VENDORID = SUPPLIER_ADDRESS.VENDORID) where vendorid was the Licence Id for the vendor.
- Do not forget to insert the Runtime Input Argument into the mashup design. You can insert the argument (arg_0 which is the default value) as shown below.

- Save the project. Right click on the project and select Build Project. Observer that SandraEDM.wsdl is created below in the project node.
- Your Data Mashup is ready to be deployed as a service !!


Step 7: Deploy Data Mashup in Glassfish App Server
- To create a composite application, go to NetBeans files menu. Under Files, select --> New Project --> SOA --> Composite Application -- Next.
- Select Project Location and Name for the Composite Application Project. For this project, name being selected is SandraEDMCompApp.
- Select Finish. Observe that the Composite App project is created on the NetBeans Projects tab. Also observer that a casa (composite application service assembly) editor opens up in the NetBeans.
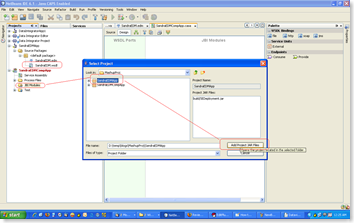
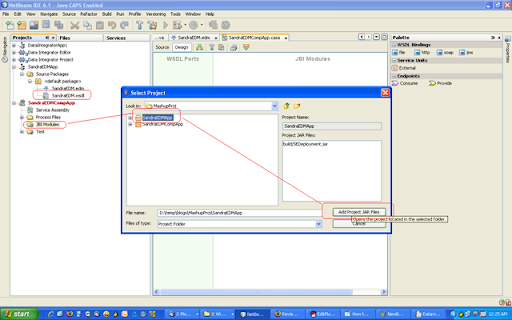
- Now add Mashup Application to the JBI modules of the composite app. Right-click on the JBI Modules and select Add JBI Module.. from the list. Select SandraEDMApp project in the list shown and say Add Project Jar File. Observe EDM app being added as JBI Module in the Composite App.
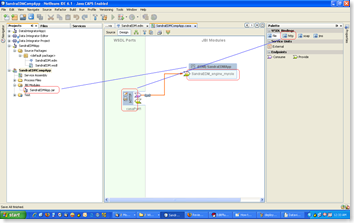
- From the casa editor palette, drag and drop the HTTP WSDL bindings into the editor and build the comp app once. An end point for connection to SandraEDMApp comes up on the editor.
- Connect the HTTP consumer endpoint to the SandraEDMApp endpoint.
- Build the Composite App project once again.

Step 8: Tweaking the Composite App wsdl
* Note that this step would eventually be removed but this is what is needed for now.
- Double click and open the wsdl generated in SandraEDMCompApp --> Process files --> SandraEDMCompApp.wsdl
- Here is how to tweak the wsdl :
- Include part into node <http:operation location="(part)"/>
- change <http:urlEncoded/> to <http:urlReplacement/>
- Change the http service url to include a concerete port instaed of the default port from where mashup service can be accessed i.e. replace ${HttpDefaultPort} with <available port no on the host>. For this project, I am using 9097
Right click on the Composite Application project and Deploy the Application. Look for the success message and verify the same on the Glassfish Application Server.
Step 9: Accessing the Mashup Service.
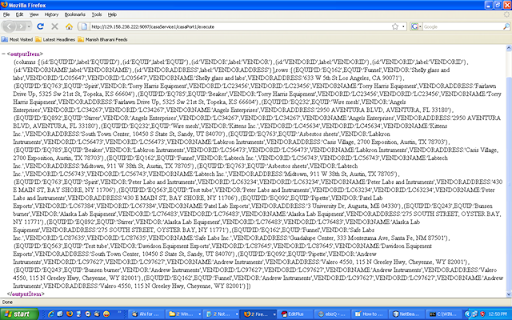
Open the browser and hit the following URL
where 129.158.238.222 is the ip address of the host running the service.
Observe that the federated view of the data in two different data sources is reported in JSON format.
Note that the output data format can be changed to xml or webrowset by changing mashup-engine properties and redeploying the same into Glassfish JBI services.
Step 10: Using the Data from Mashup Service
The JSON output from the service can be parsed using standard JSON parsers in any application. The Vendor addresses can be parsed and fed into a Google Locator service and approximate distance to business addresses can be fetched. Based on this, Sandra (hope we still remember her !) can get some crucial insight about sourcing her business from near-by vendors. By the virtue of being a JBI service, data can also be sent over to other services using SUN Enterprise Service Bus.
Database files used to create this Mashup can be downloaded from here.
Sphere: Related Content
1 comments:
Glass Agencies are Manufacturer & Exporter of all type of Laboratory Glassware, Scientific, surgical, medical, hospital, laboratory, dairy, milk testing instruments & equipments under EROSE brand including Chemical, charts, models & Slides
Kindly send us your requirement so that we can quote to you our best prices
Regards
NITIN (Export Manager)
----------------------------------------------------------------------
An ISO 9001:2000 and D&B Certified Company
From : M/S Glass Agencies,
5309, Anaj Mandi,
Ambala Cantt-133001(India).
Ph : 0091-171-2633027 (Office),
Ph : 0091-171-3293186 (Res),
Fax : 0091-171-2640566
Cell: 0091-9416024836 & 9896807858
E-Mails : glass@sancharnet.in
glass321@yahoo.com
Web Site : www.glassagencies.com
----------------------------------------------------------------
Post a Comment